Step 1: Click the Buy Now button the course or bundle landing page. To be directed to our eLearning portal, click here.
Step 2: Adjust the number of courses you require. Fill in the rest of the information required and submit payment.
IMPORTANT NOTE: If the email address you are entering at the top of the billing page is not associated with a CharityVillage eLearning account, the platform will immediately prompt you to create one to manage your group purchase once you've submitted payment. Don't worry, if you would like to update this email address at any time after this purchase, just email help@charityvillage.com and someone will assist you.
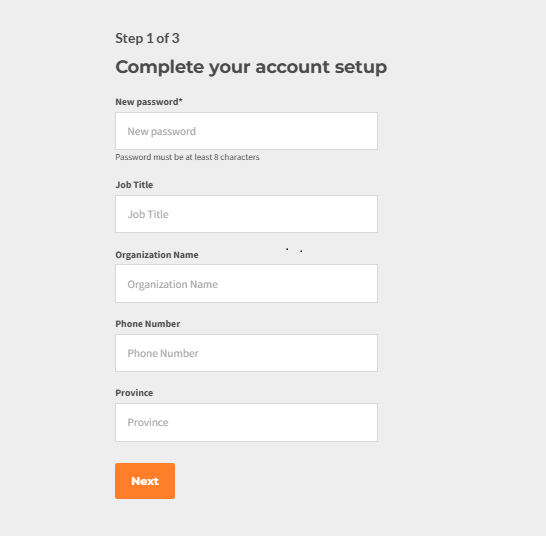
Step 3: If you don't have an account set up with the email you entered on the previous page, you will see the following screen that will prompt you to enter a password of your choosing. The rest of the fields on this page are optional to fill out.
Step 4: Select Yes, if you will be consuming this course or bundle you are purchasing. If you are only purchasing on behalf of others, select No and click NEXT.
Step 5: Select the orange, Manage Seats button to be redirected to your ADMIN dashboard. Your receipt will be emailed to you, but you can also click the link to view it.
Step 6: For the remainder of this tutorial, we’ll use the example of five Boards That Work courses being purchased, with the purchaser choosing to enroll themselves as one of the participants.
Click the Manage button to locate the shareable link you can send to others for course enrollment. Alternatively, you can set up their access manually.
Step 7: Overview of ADMIN dashboard functionality
#1 Copy sign-up link: Click this button and then copy and paste the link into an email to share with anyone who needs access to the course. If they don’t already have an account, they’ll be prompted to create one. Once their account is set up, the course will appear immediately on their student dashboard.
#2 Purchase more: Need more of this same course to enroll others? Click the Purchase more button at the top right and submit payment.
#3 Add user: If you wish to enroll the user yourself in the course, click Add User. You will be prompted to enter their email and name. They will receive an enrollment email with instructions on how to set their password and access the course.
#4 Bulk import: Do you have a large number of people you would like to enroll? Click the Bulk import button to download an excel template. Add the names and email addresses to it. Follow the instructions to upload it and the system will send each person an enrollment email with instructions on how to access the course.
#5 Purchased: This number tells you how many of these courses or bundles you purchased.
#6 Available: This number represents how many you have left to assign.
#7 Claimed: This number tells you how many have been assigned/consumed.
#8 Account: To update your account details like email address or password or to view your certificate(s) if applicable, or a receipt, click Account.
To return back to your ADMIN dashboard after clicking Account, click your name at the top right and then ADMIN from the drop down.
#9 My Student Dashboard: Click My Student Dashboard to be redirected to your courses.
Have questions? Please email help@charityvillage.com