How do I create a pre-hire video screening and send to candidates?
How to create a pre-hire video screening and send to candidates.
IMPORTANT NOTE:a candidate will have the option to record their responses without video. Later in this article, you will see where you can indicate your preference (using both audio and video, or just audio) to the candidate.
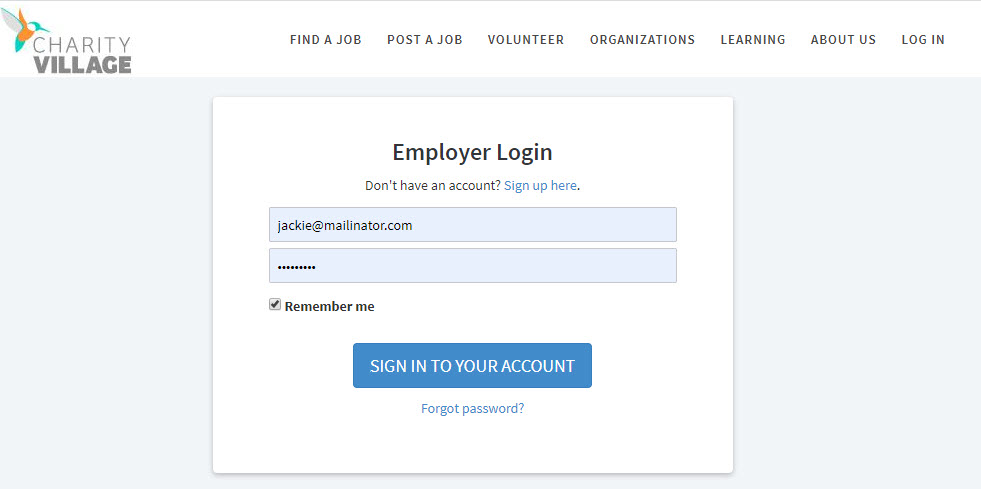
Step 1: Log in to your CharityVillage Employer account.
If you don't have a CharityVillage account, click "Sign up here" to quickly create one.
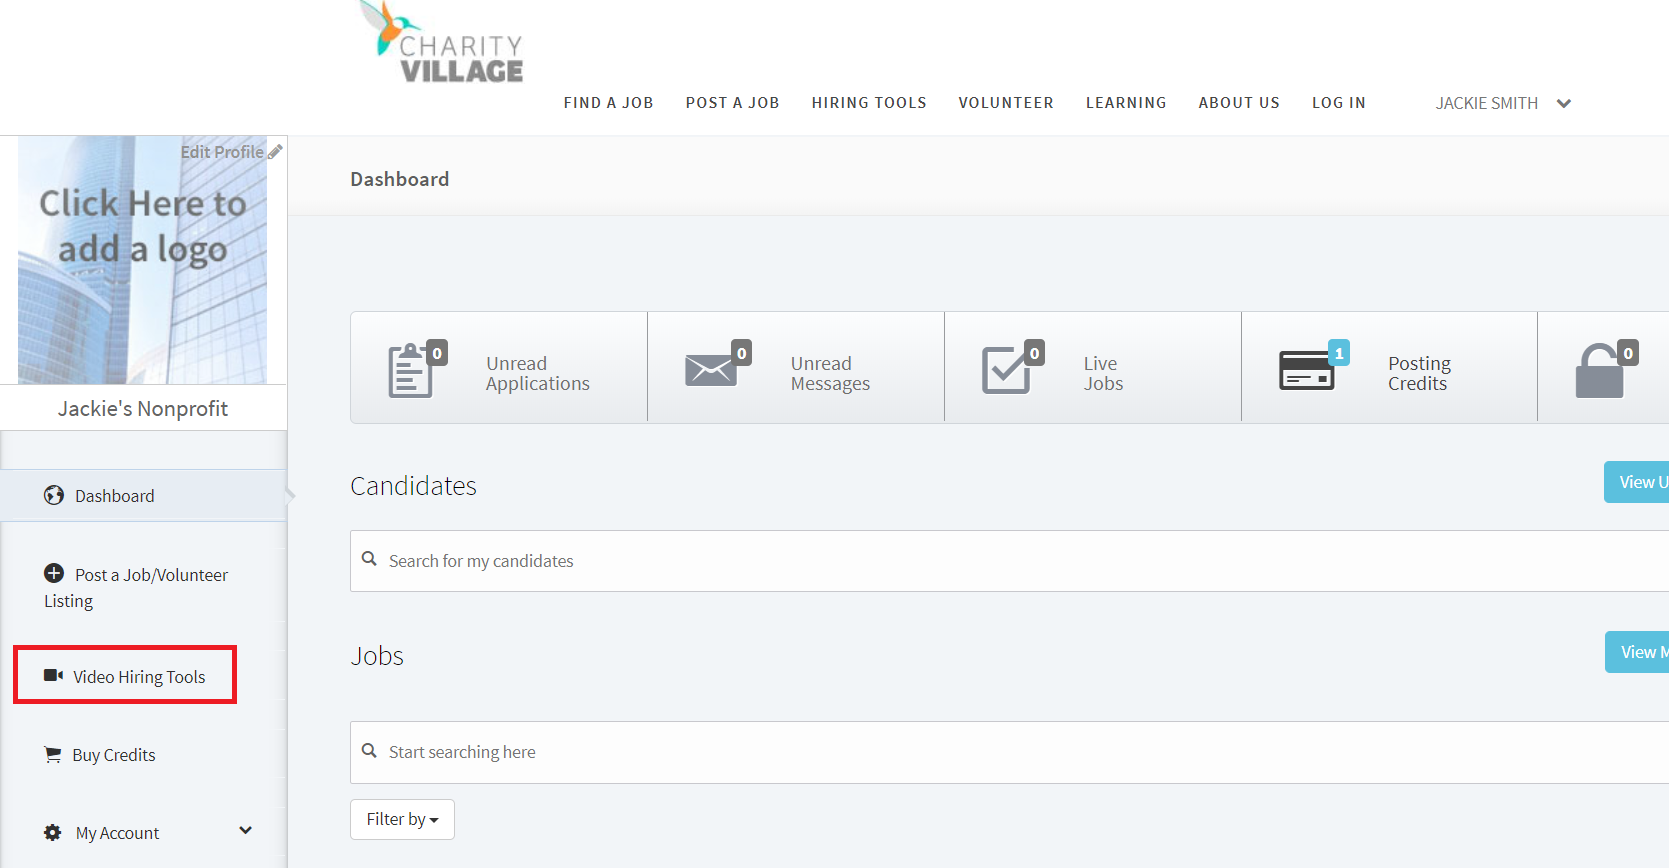
Step 2: Click Video Hiring Tools from the menu on the left-hand side of your employer dashboard.
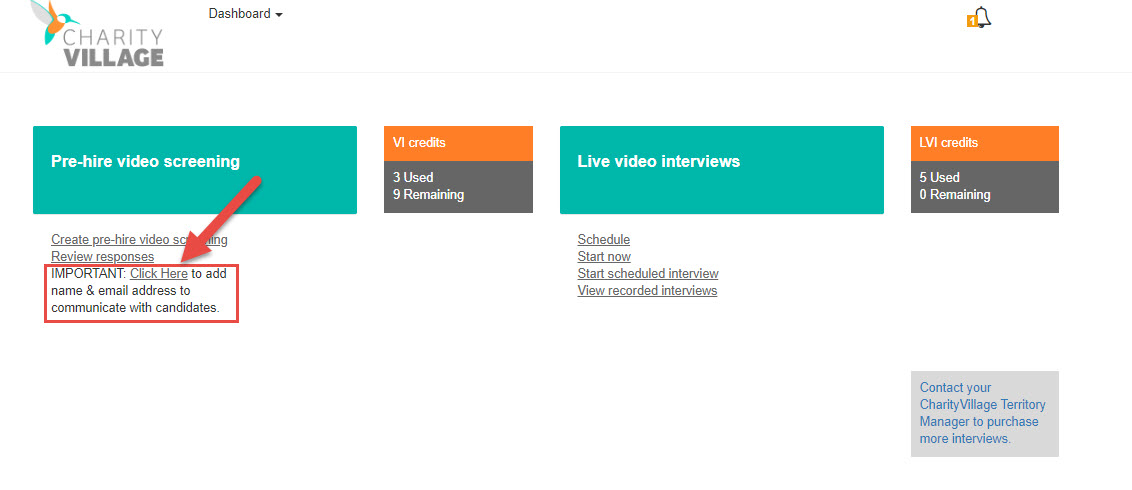
Step 3: Add the email address and display name you would like to use for candidate communications. If you have already set this up, please continue to Step 4.
IMPORTANT NOTE: You can change the email address and display name at any time.
1) Select CLICK HERE to add your email address and display name.
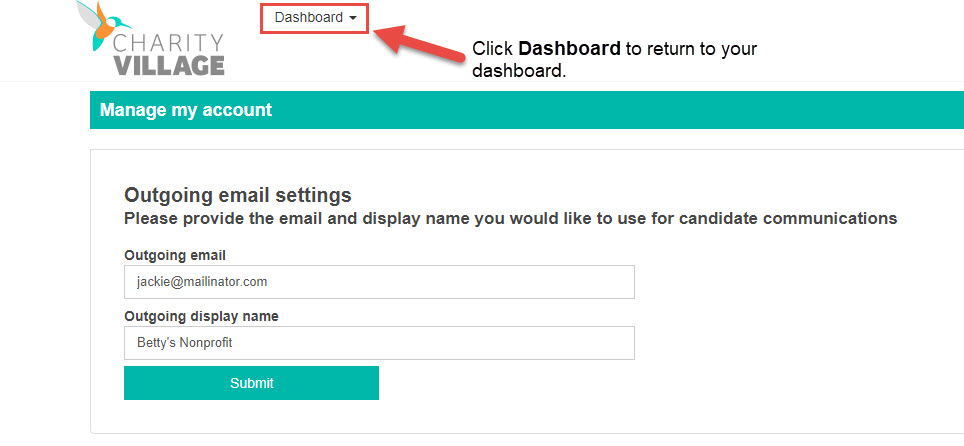
2) Enter the email address and display name you wish candidates to see. All candidate responses will be stored for pre-hire video screening under REVIEW RESPONSES (located above CLICK HERE - refer to screenshot above).
3) Once you're finished, click SUBMIT.
4) Click the word DASHBOARD at the top of the screen to return to your dashboard. If you click the CharityVillage logo, you will be brought back to the main CharityVillage website.
Step 4: Set up your Organization Profile (If you already set up your profile, please continue to Step 5)
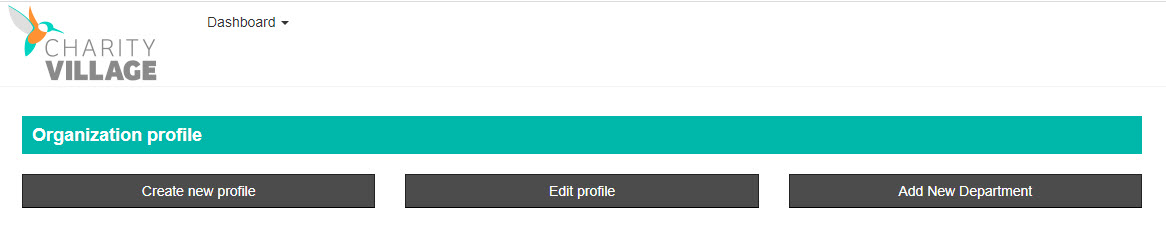
1) Hover your mouse over Dashboard and click Organization Profile.
IMPORTANT NOTE: You can set up multiple organization profiles.
2) Click Create new profile.
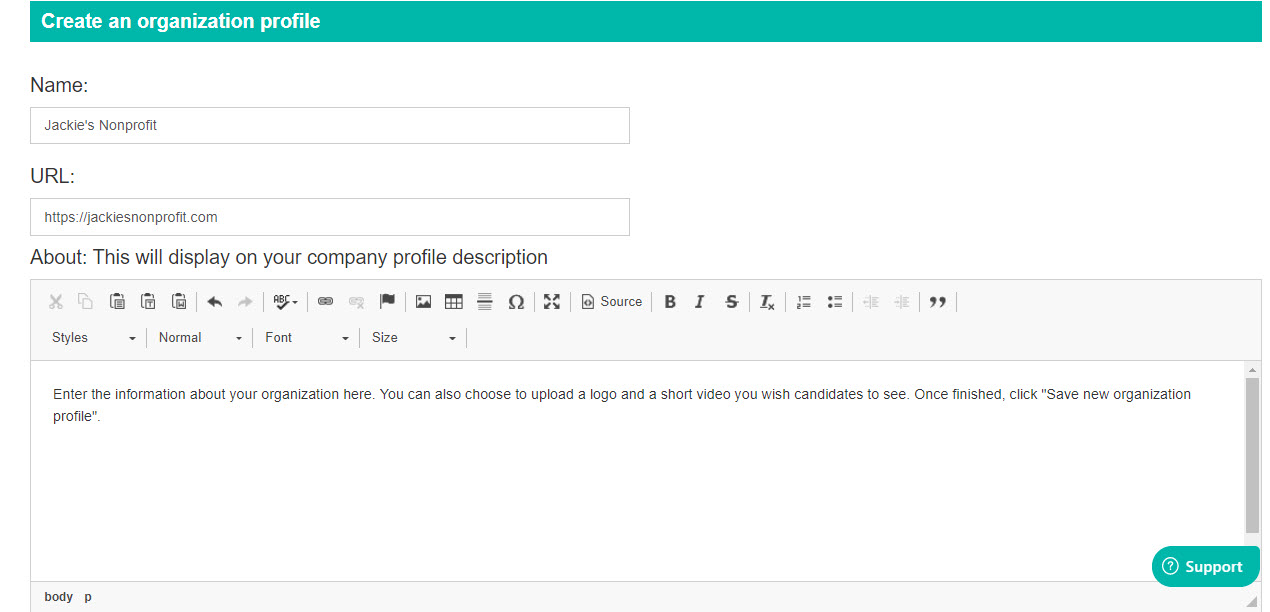
3) Enter your organization name and a small description about the organization.
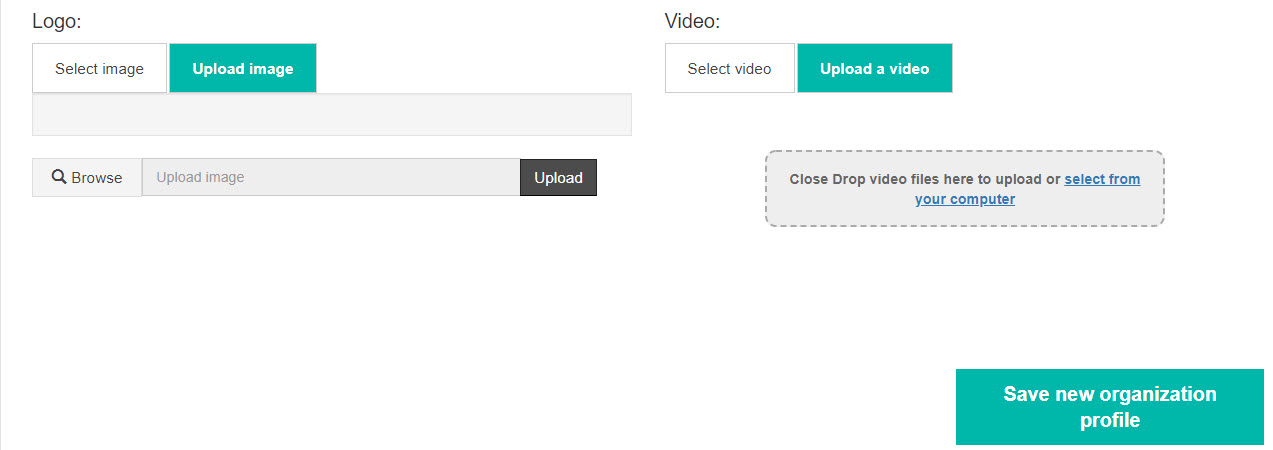
Name: Enter the name of your organization. URL (optional): Enter the URL for your website.Make sure the URL starts with https:// or you will receive an error when attempting to save your profile. About: Enter a short description about your organization. Logo (optional): Upload your logo from your device by selecting BROWSE. Once your file has been uploaded, click they grey UPLOAD button. Video (optional): If you have a short video about your organization, you can upload it here.
4) Once you are finished, click Save new organization profile. You will then be automatically redirected to your dashboard.
Step 5: Create your pre-hire video screening
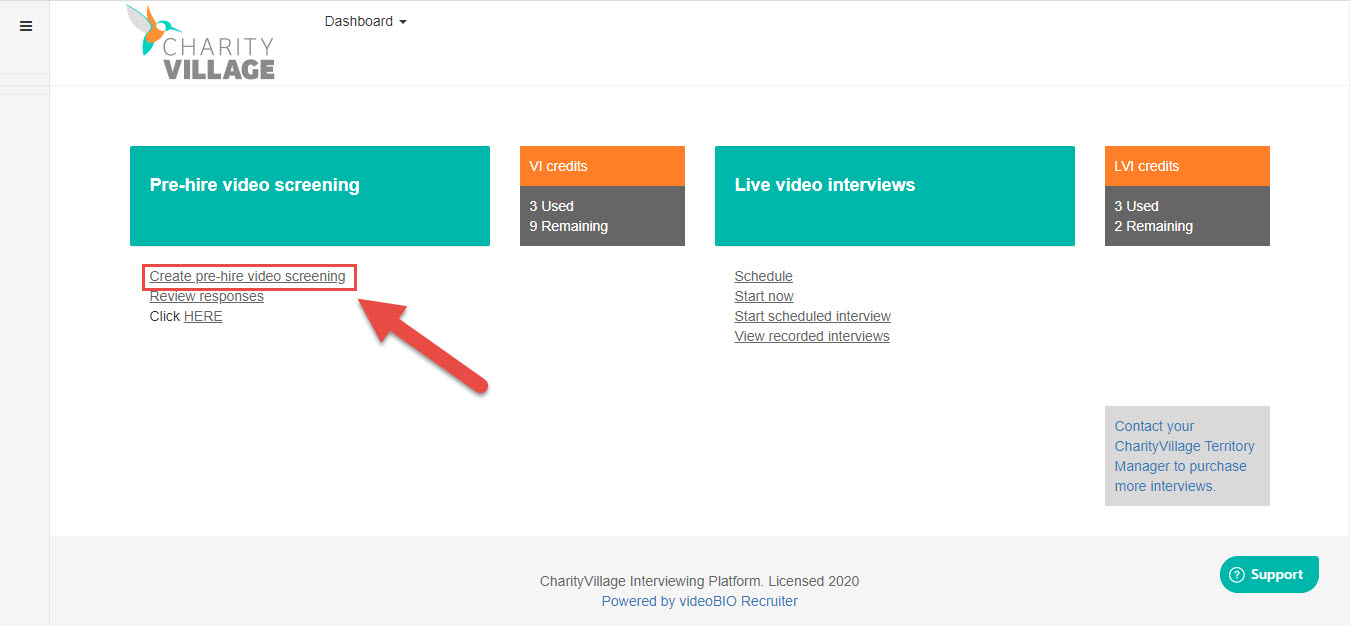
1) Click Create pre-hire video screening
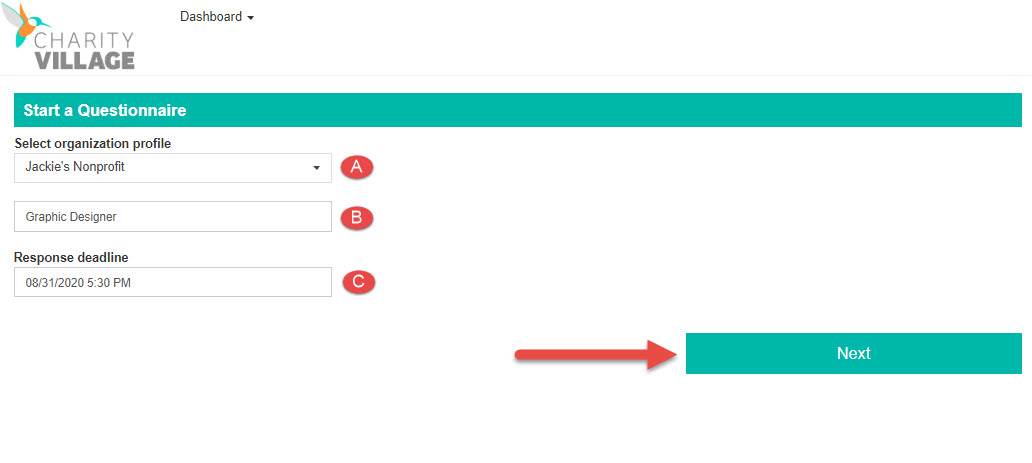
2) Choose the organization profile, enter job title and the response deadline.
A) Choose the organization profile you wish to use from the drop-down menu
B) Enter the job title you are hiring for
C) Select the date and time you wish candidate(s) to submit their responses by and then click NEXT
Step 6: Choose your template (3 questions for each template)
You are given three options to choose from to create your pre-hire video screening.
Template A and B have pre-set questions. To view the questions, click on the name of the template. If you decide you would like to use one of these templates, click the green arrow to the right of it.
To create your own screening questions, click the arrow to the right of the page. For each question box, you can choose from a database of questions and edit them after you have selected from the database OR, type in your own questions. Just remember to click Save questions to move on to the next page.
Step 7: Send pre-hire video screening to candidate(s)
This next page will give you two options for how you would like to invite candidates to complete their responses.
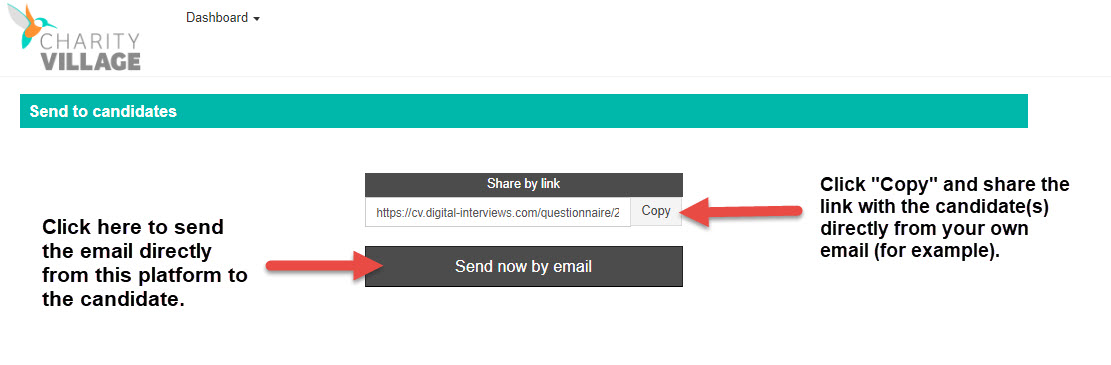
1. FIRST OPTION:
Click the COPY button and paste the link directly into your email on your device. Include the important information you wish the candidates to know. For example; you might want to include whether you require the candidate to record their responses with a video or just audio, or both.
2. SECOND OPTION:
Click Send now by email to reveal the email template.
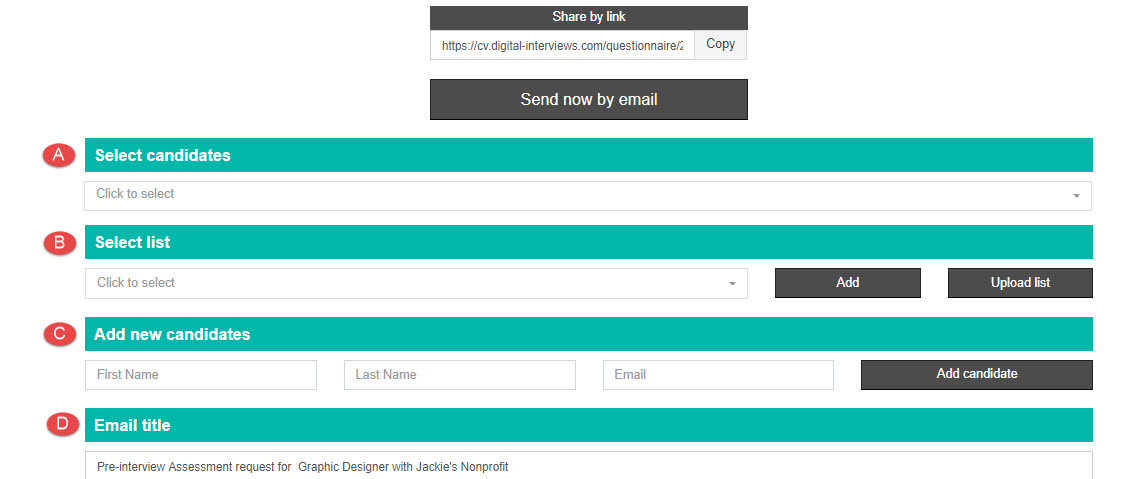
A)Select Candidates - Candidates will appear in this drop down menu if you have used this system before. If this is your first time, no candidates will appear.
B)Select List - This is a great option to use if you're looking to invite a number of candidates to submit responses to your pre-hire video screening you just created and do not want to add each candidate manually in the next section - Add new candidates. I recommend selecting the button Upload List, as a pop-up box will appear indicating the file type you need (CSV file) and how to arrange each candidate information in the file to successfully upload the list. There is also a link in this pop-up box that you can download the sample CSV file to your computer with the headings needed.
IMPORTANT NOTE: If you email more than one candidate at a time when using our system, the other candidates will NOT see the other names and email addresses that the invite is being sent to.
C)Add new candidates - To manually add one or more candidates at a time before you send the invite, enter their first name, last name and email address and click Add candidate. Repeat this step if adding additional candidates.
D)Email title - This field is automatically filled in for you, but if you prefer a different subject line, just click on the field to make your edits.
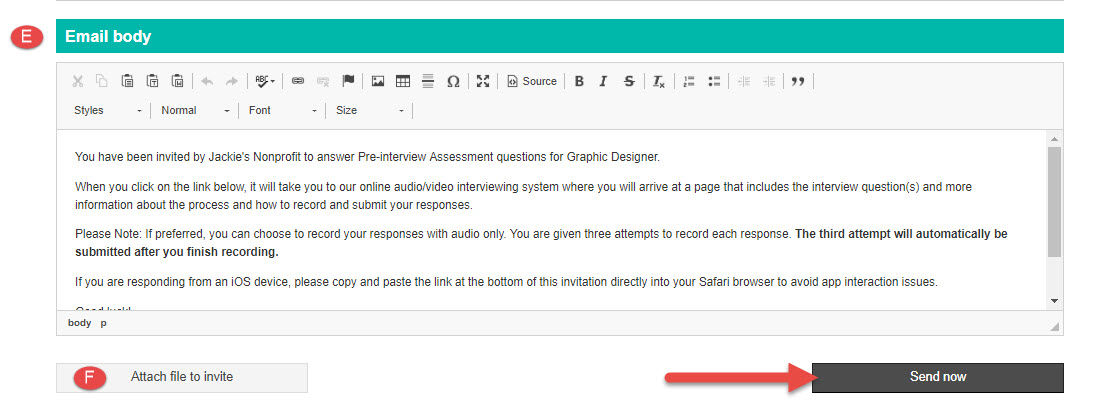
E)Email body - You will notice this field is automatically filled in for you. However, if you prefer to make changes or add additional information, you can do so.
IMPORTANT NOTE: This is a good place to indicate whether you require candidates to include video with their responses. If you prefer to leave the decision with the candidate, please add that here.
F) When you're finished, click Send now. At the top of the page, you will notice a message appear indicating the invite was successful. When the message disappears, you will automatically be re-directed to your dashboard.
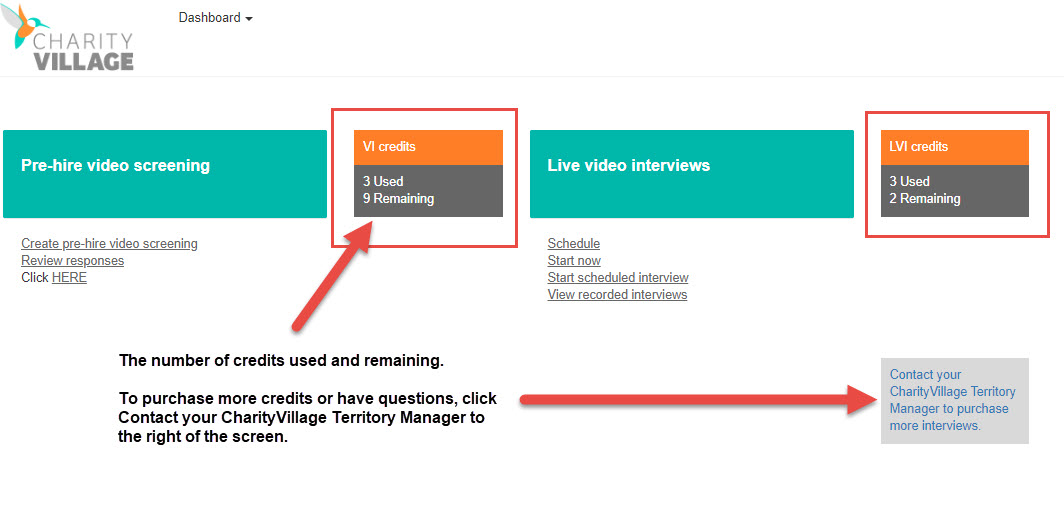
Your dashboard keeps track of the number of credits used and remaining. If you need to purchase more credits or have questions, click Contact your Territory Manager to the right of the screen. You can also contact our National Help Desk at 1-800-610-8134 or help@charityvillage.com.
 Step 7: Send pre-hire video screening to candidate(s)